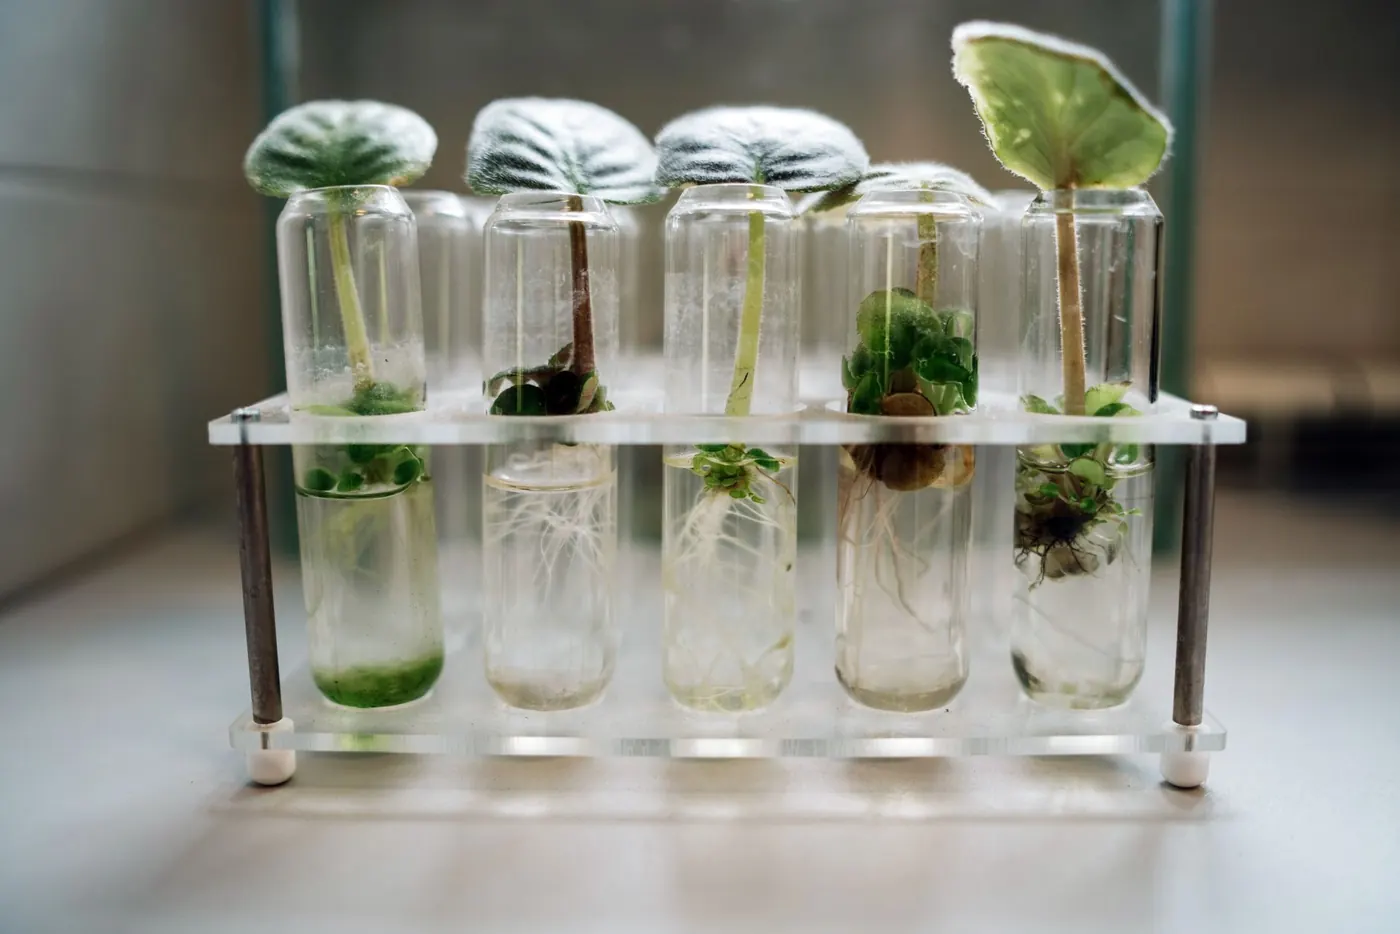
- Rest sealed cups for 3–7 days in bright, indirect light before deflasking, and deflask immediately if mould appears on the agar.
- Remove every trace of agar under lukewarm water; sugar left on roots feeds mould and soft rot inside the dome.
- Use loose long-fibre sphagnum or a fine bark-perlite-coir blend, damp but never wet.
- Wean humidity in weekly steps: about 95%, 85%, 75%, then 60% by day 28.
- Hold off feeding until week three, then use a quarter-strength feed and raise light gradually.
Why lab-grown plantlets cannot simply be potted up
A plantlet inside a sealed tissue culture cup has spent its whole life at close to 100% relative humidity, under low light, on an agar gel containing sucrose, mineral salts and growth regulators. It has never had to limit its own water loss, and it has never had to make all of its own sugar. Three consequences follow, and every step of this protocol exists to correct one of them.
First, the leaf cuticle is thin and the waxy layer on its surface is barely formed, so water escapes from the leaf far faster than it would from a glasshouse-grown plant. Second, the stomata on in-vitro leaves are often slow to close, or stay open in dry air, because they developed where there was never any reason to shut. Third, the roots grew through a gel rather than an air-filled substrate: they are brittle and glassy, and they lack the root hairs and toughened outer tissue that cope with drying. Put an untreated plantlet on a windowsill at 45% humidity and it can wilt beyond recovery in an afternoon.
Acclimatisation, sometimes called ex-vitro hardening, is the controlled process of building a working cuticle, functional stomata and air-adapted roots while the plant switches from feeding on sugar in the agar to photosynthesising for itself. On our benches that takes about four weeks for most aroids, and the same 28-day rhythm works at home provided humidity is lowered deliberately rather than by guesswork.
Timing, kit and the growing environment
Deflask in spring, summer or early autumn if you have the choice. Plantlets harden fastest at 22–26°C with 14–16 hours of light at roughly 40–80 µmol/m²/s, which a basic LED panel 30–40cm above the dome provides easily. Deflasking between November and February is perfectly possible, but only with a thermostatically controlled heat mat and a light, because a cold, dim windowsill stalls root growth at exactly the moment the plant is most exposed.
When your cups arrive, do not open them straight away. Stand them in bright, indirect light at room temperature for three to seven days so the plantlets recover from transit. Check them every day. A fuzzy white or grey growth on the agar, or cloudy, slimy patches around the base of the shoots, means the cup must be deflasked immediately whatever the season, because mould spreads through the gel faster than any plantlet can outgrow it.
Gather everything before you start: a clear propagation dome or lidded box with adjustable vents, a digital hygrometer that sits inside it, a bowl of lukewarm water, a soft paintbrush, clean tweezers, scissors wiped with isopropyl alcohol, 6cm clear slotted pots or a shallow seed tray, a root bath such as the X-Vitro conditioning solution supplied with our tissue culture plantlets and kits, and your chosen medium, pre-moistened and squeezed until it is damp rather than dripping.
Washing out the agar without breaking roots
Agar left on the roots is the single biggest cause of losses after deflasking. It is full of sucrose, and any gel clinging to the root zone becomes food for Botrytis cinerea, Pythium and bacterial soft rots once it sits in a warm, humid dome. Every trace has to come off, yet in-vitro roots snap if you pull on them.
Ease the whole gel plug out of the cup in one piece; cutting the plastic away with scissors is gentler than levering the plug with a spoon. Drop it into water at 25–30°C and leave it for five to ten minutes. The gel softens and the plantlets begin to drift apart. Work the agar away with your fingertips and the paintbrush while everything is still under water, replacing the water as it turns cloudy, and finish each plantlet with a brief rinse under a gentle, tepid tap.
Separate plantlets only where each one already has its own roots. A tight group sharing one root mass is better potted as a single unit and divided at the first repot. Pinch off any brown, translucent or collapsed leaves, and set aside any shoot with no roots at all. Rootless shoots can root in a separate pot of sphagnum, but they should never share a dome with healthy plantlets, because they are the ones most likely to rot.
The root conditioning bath
A short bath reduces the fungal load on the tiny wounds left by washing and encourages fresh root initiation. Dilute X-Vitro, or a fungicide approved for ornamental use, exactly to the label rate and soak the cleaned plantlets for 10–15 minutes. Longer is not better: overlong soaking waterlogs fragile tissue and invites the soft rot you are trying to prevent. Lay the plantlets on damp kitchen paper while you fill the pots and keep them covered, because even five minutes of open air on a dry day can scorch in-vitro leaves.
Choosing the medium: sphagnum or fine bark and perlite
Long-fibre sphagnum moss is the forgiving option. It holds many times its own dry weight in water while keeping open air spaces, it is naturally acidic and mildly antimicrobial, and it unwraps cleanly from roots at the first repot. Its weakness is that it is easy to overwater: packed tight and kept soggy, it suffocates the roots it is meant to protect. Wrap it loosely around the root zone and press it lightly into the pot; never ram it in. Our Grade-A long-fibre sphagnum is the same grade we use on the deflasking benches.
A fine bark-mineral blend suits growers who want the plant to move into its adult substrate without a second change of medium. Mix roughly 40% fine pine bark (3–6mm), 40% fine perlite (2–4mm) and 20% buffered coco coir from our raw components range. It drains faster and builds tougher roots, but the surface dries quickly, so it needs closer attention to dome humidity during week one.
For Alocasia and Anthurium plantlets we lean towards sphagnum, because their fine early roots appreciate steady moisture. For vigorous Monstera and Philodendron we often go straight into the fine bark blend. Either works if the humidity schedule below is followed.
The 95% to 60% humidity weaning schedule
The principle is to lower humidity in steps the plant can follow, letting it build cuticle and stomatal control before it is asked to rely on them. Measure with the hygrometer inside the dome. Condensation on the lid tells you the air is saturated, not what the humidity will be once a vent is open.
- Days 1–7, about 95%: dome closed, vents shut. Wipe heavy condensation off the lid each day so drips do not rot the crowns, and lift the lid for ten seconds once a day to exchange air.
- Days 8–14, about 85%: open the vents a quarter to a half. New leaves should start to look matt rather than glassy.
- Days 15–21, about 75%: vents fully open, and the lid propped ajar for two to four hours a day, a little longer each day.
- Days 22–28, about 60%: lid off in the daytime, back on overnight for the first few nights, then off for good.
If a plantlet wilts or curls its leaf edges when you open up, return to the previous stage for 48 hours and then try again. Wilting that recovers within an hour of closing the dome is normal adaptation. Wilting that persists means the roots have failed, and that plantlet needs lifting and checking.
Feeding, light and the first potting-on
Plantlets carry sugar reserves from the agar through their first week or two, so they need no feed before week three. From then on, use a balanced liquid feed at a quarter of the label rate, around 0.3–0.5 mS/cm EC, at every second watering. Raise light gradually as humidity falls, working towards 80–120 µmol/m²/s by day 28; a plant that is now photosynthesising for itself stretches and pales if it is left in dome-level light.
Pot on into a 6cm or 9cm clear slotted pot with the adult genus mix, such as the Monstera & Philodendron Mix or the Anthurium Epiphytic Mix, once new white roots are visible at the pot wall and the plant has produced at least one new leaf outside the dome. A tray of small pots needs far less substrate than most people expect, and the repotting calculator will give you the exact volume.
Step-by-step protocol
- Rest the sealed cupsKeep cups closed in bright, indirect light at room temperature for 3–7 days after arrival, checking daily for mould or cloudy patches on the agar.
- Prepare the dome and mediumSet the dome up at 22–26°C with a hygrometer inside, pre-moisten sphagnum or a fine bark-perlite-coir blend, and wipe tools with isopropyl alcohol.
- Soften and remove the agarLift the gel plug out whole, soak it in water at 25–30°C for 5–10 minutes, then work every trace of agar off under water with fingertips and a soft brush.
- Sort and separateDivide only plantlets that have their own roots, pinch off dead or translucent leaves, and set rootless shoots aside in a separate pot.
- Give the root bathSoak cleaned plantlets for 10–15 minutes in X-Vitro or a label-rate ornamental fungicide, then keep them covered on damp paper.
- Pot looselyWrap roots in loose sphagnum or set them into the fine blend in 6cm clear pots, firm lightly and settle with a fine mist rather than a soaking.
- Wean the humidity weeklyHold about 95% for days 1–7, 85% for days 8–14, 75% for days 15–21 and 60% for days 22–28, stepping back 48 hours if plantlets wilt.
- Feed and raise light from week threeStart a quarter-strength balanced feed (0.3–0.5 mS/cm) at every second watering and raise light towards 80–120 µmol/m²/s.
- Pot on after day 28Move into 6–9cm clear slotted pots of the adult genus mix once new roots show at the pot wall and a leaf has formed outside the dome.
Symptoms vs root causes
| Symptom | Root cause | Action |
|---|---|---|
| Fuzzy grey growth on the medium or stems in week one | Agar residue feeding Botrytis and other moulds | Remove affected plantlets, rinse the remaining roots, wipe the lid and increase the daily air exchange. |
| Translucent, water-soaked stems collapsing at the base | Bacterial or Pythium soft rot in saturated, compacted medium | Discard collapsed plantlets and repot the rest into fresh, looser medium; water only with a mist. |
| Leaves wilt within minutes of opening the dome | Cuticle and stomata not yet functional; humidity dropped too fast | Close back to the previous weaning stage for 48 hours, then retry more gradually. |
| No new growth after three weeks | Too cold or too dark for roots to establish | Add a heat mat holding 22–26°C and give 60–100 µmol/m²/s for 14–16 hours a day. |
| Pale, stretched new leaves in week four | Light no longer sufficient now the plant feeds itself | Lower the light or raise its output towards 80–120 µmol/m²/s. |